
Material Study: Playing with Concrete

5 concrete bricks, 5 different recipes
I have been having a wonderful time pushing the boundaries and abilities of a material once again. This time, the medium in question is concrete. One of my advanced sculpture classes this semester is a concrete class, and I have been enjoying learning about the history of the material as well as the political context it has today in ways we deem concrete valuable or valueless. For our very first project in this class, we are working on trying out 5 different concrete recipes to make 5 concrete castings of a 5”x5” brick. This material study is supposed to familiarize ourselves with the material and learn what different recipes would work best for future projects. We used Smooth-On Mold Max 40 to take castings of our relief designs, which I decided to do something complicated for. I laser engraved a sheet of acrylic with a continuous lace design, where the pattern would continue seamlessly when the bricks aligned next to each other on all sides.
Laser cut 5” x 5”x. 125” acrylic lace
Why lace? I was super interested in playing around with the meaning of these materials for this materials study. Lace, which is inherently soft and feminine, directly contrasts this industrial and almost masculine material. I loved the idea of taking something so not soft and feminine, making it something it isn’t, and pushing the boundaries of the meaning and context of the material. My pattern was rather complicated, with lots of cuts and lots of tiny little pockets that posed a great opportunity for the Mold Max to get caught in and rip off when de-molding. I kind of knew this would happen from the get-go, was open to it, and was drawn to the idea of what I have been referring to as just a “waft” of lace. I was excited about the possibility of the lace design looking distressed and almost ancient once cast on the bricks surface.
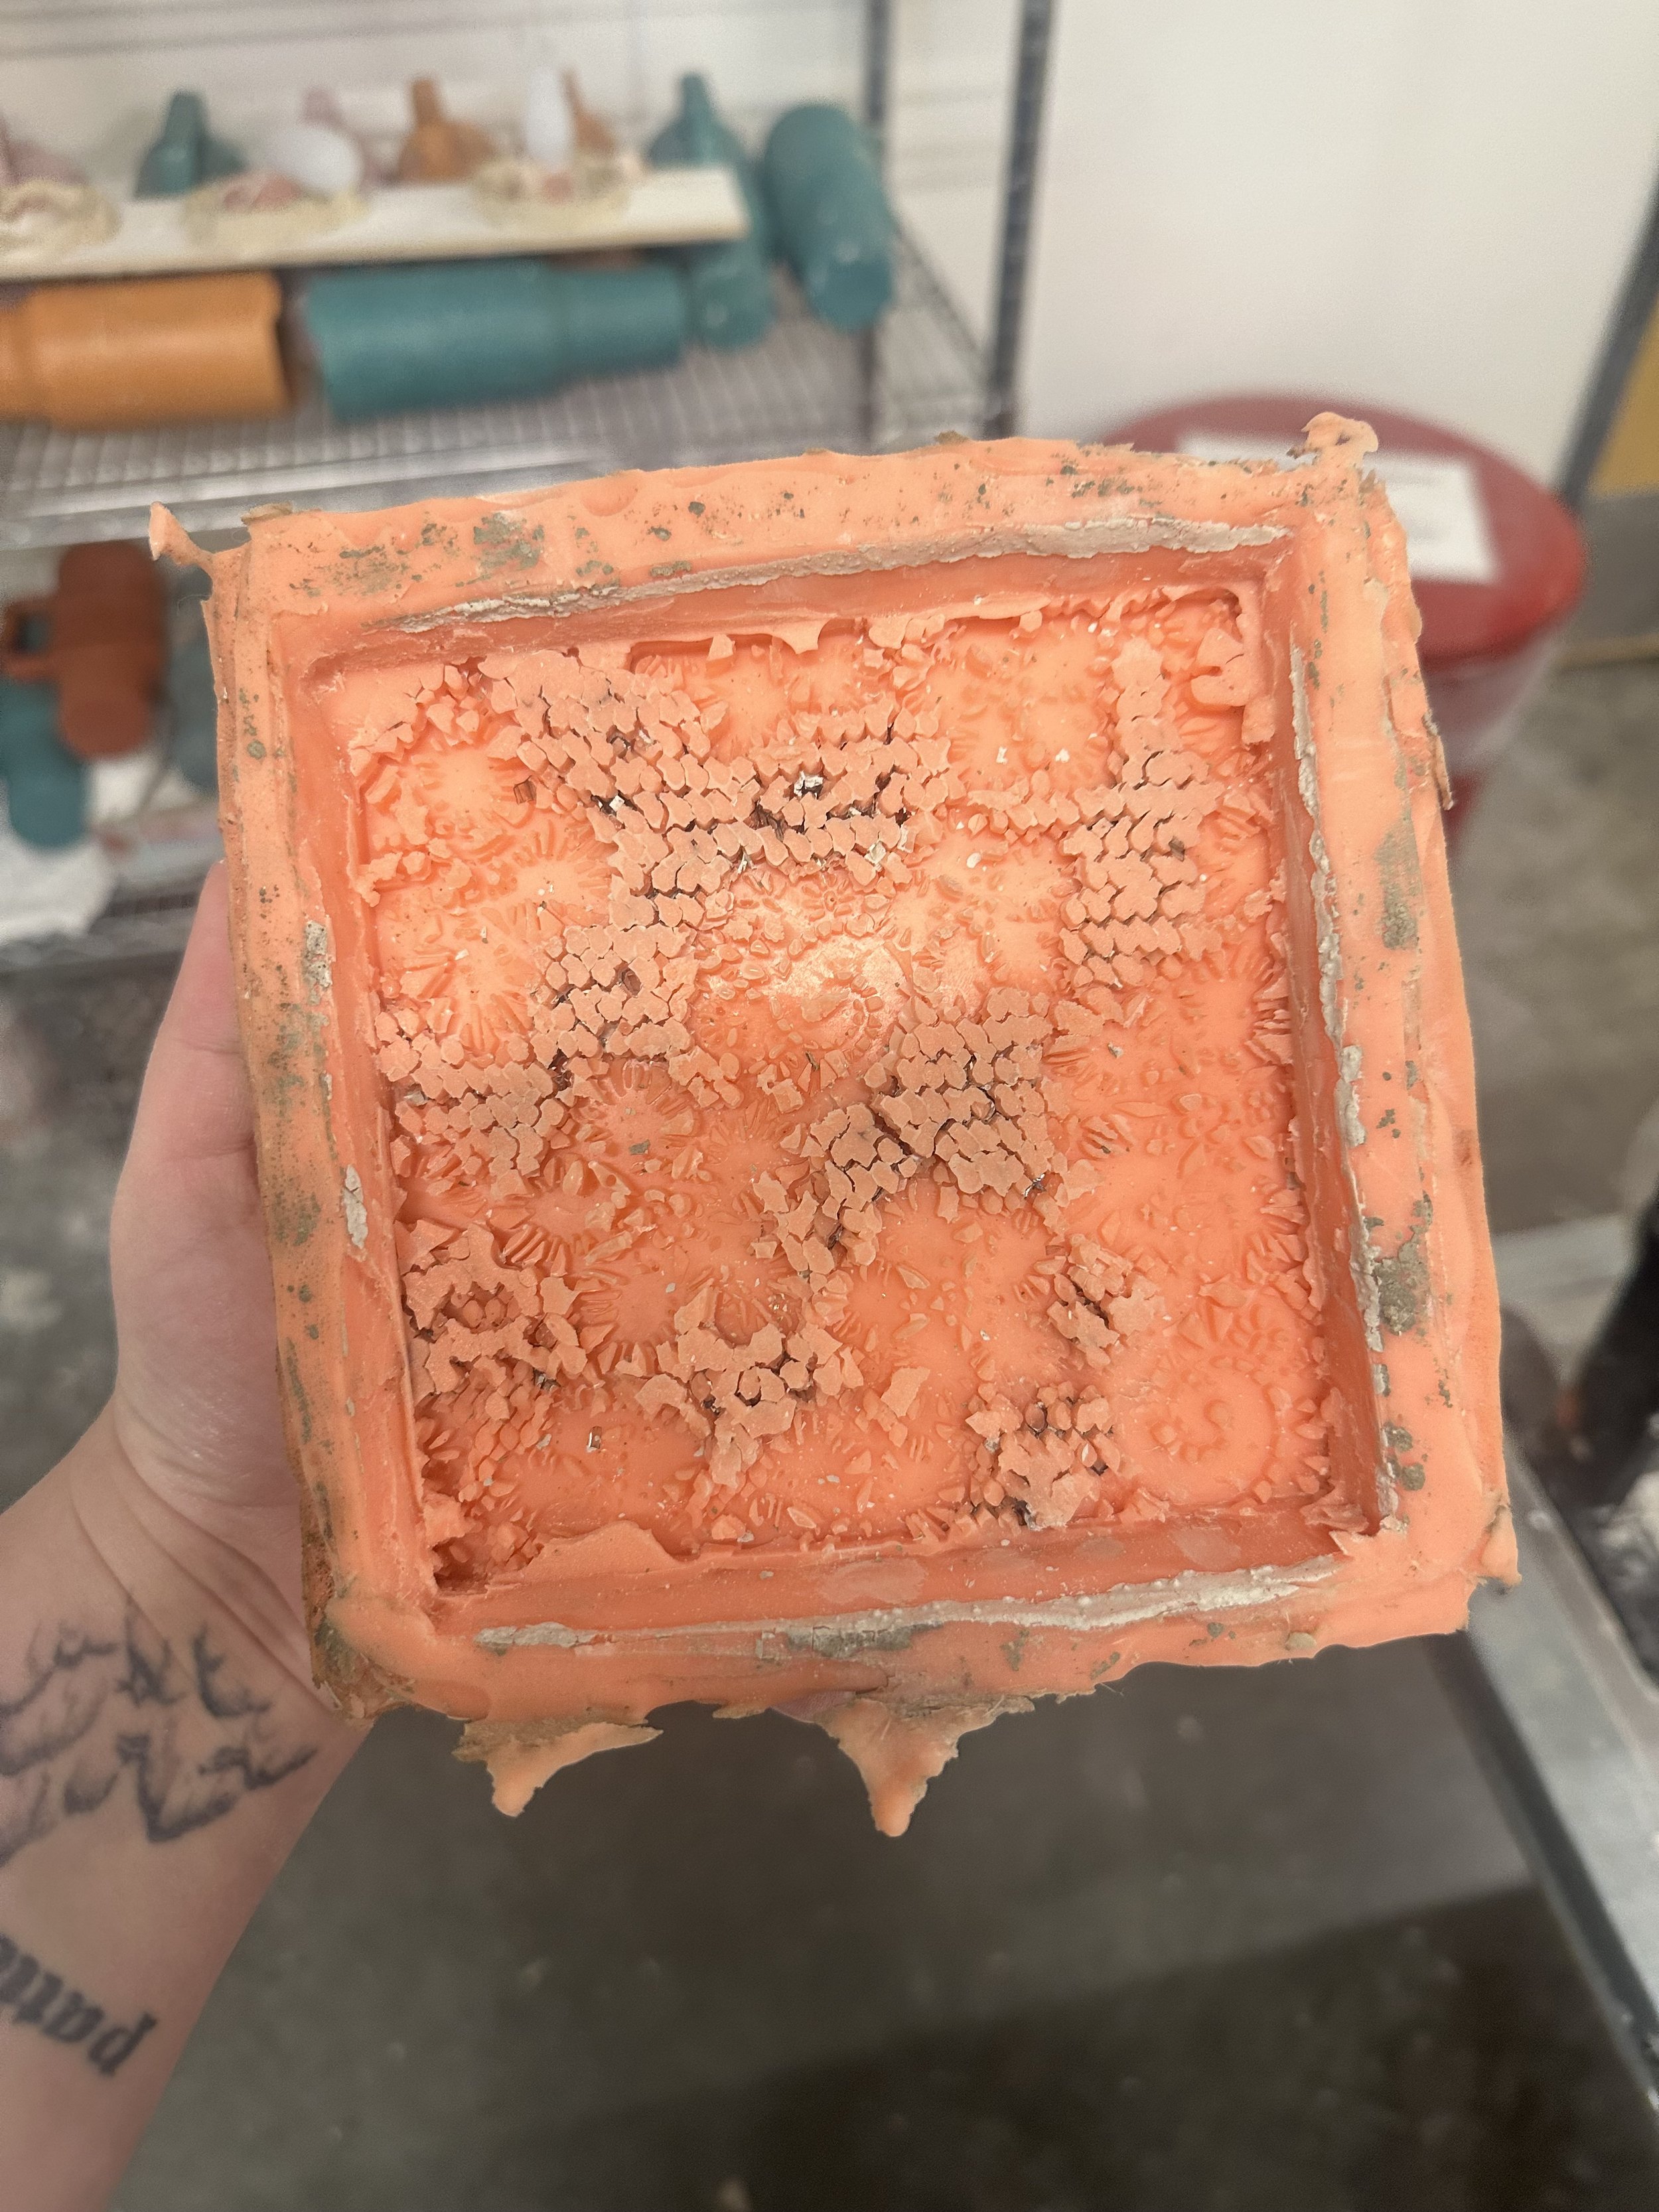
Mold Max 40- Silicone Rubber Compound Mold of my lace design
Without the first casting, it was rather hard to tell if my mold accurately captured my lace design. I held onto hope and went into my first casting with the most optimism possible. The first concrete recipe I tried was just your standard quick-crete that is pre-portioned that you can buy in a large bag from Home Depot, Lowes, or just your local hardware store. This formula was super easy to use because of its predetermined cement-sand-aggregate ratio. Although this store-bought “boxed cake mix” type of mixture provided a lot of ease for eliminating the need to measure things on your own, the pebbles used in the material for the aggregate were a lot chunkier than I had hoped and ultimately left me with a rougher-looking cast. Unfortunately, the majority of the details in my lace design didn’t show up. This outcome immediately had me more discouraged about what the rest of my castings would look like; I doubted my lace design and questioned if maybe it was indeed too complicated. I took my somewhat disappointing results on the chin and made notes on changes i’d implement if I worked with this formula again, i.e. using a sifter to remove some of the larger pebbles to get a thinner texture.

Brick One: Quick-crete
My attempts for bricks two and three were made possible by the generous help from my friend Kim Craig. They had used a recipe that gave super smooth results, and I needed to try it. These recipes, as well as the rest in my material study, were all custom and not your store-bought predetermined ratio type of concrete. The Kim Craig recipe was much thinner, it removed the pebbled aggregate completely and captured a lot of detail. This is something my complicated design desperately called for. The recipe was 2 parts cement, 1.5 parts sand, and 2 parts perlite. Using the pearlite as the aggregate substitution (instead of the pebbles), in my opinion, is the main reason for the success of the recipe. Perlite is super lightweight causing the majority of it to float to the top, meaning the thinner part of the mixture travels to the bottom of the mold and captures the most detail possible.

Brick Two: 2 : 1.5 : 2 - Cement, Sand, Perlite
When I tell you I GASPED when I saw this casting result… The lace! It’s there! It’s alive! It was possible! The Kim Craig perlite recipe was a success! The fact that I even got those tiner holes to show up… I was so impressed and pleased with the results. I knew I wanted to use this recipe again, for it clearly worked. So for brick three, we did the same thing except added in some white pigment to brighten the color and hopefully provide more depth in the shadows of the form once dry.

Brick Three: 2 : 1.5 : 2 - Cement, Sand, Perlite + White Pigment
Another fantastic casting! The white cleaned up the appearance to where the focus was on the design and the shadows the small holes provided (RIP if you have trypophobia). This brick was possibly the best one in my whole batch. One million thank yous to Kim Craig <3. When it came time to do my 4th recipe, and with a few solid castings behind me, I felt the confidence to do something experimental. The perlite offered as a good substitute for the aggregate, but I was curious to see what would happen if I used something finer… something much finer… something like…

Adding salt to my dry mixture
Salt! Good in theory… right? Salt is similar to sand, and is super fine and lightweight. You can make concrete from just cement and sand with no aggregate, so in my head, the addition of salt might create a cast that can cast high detail, and hopefully yield a brick that would bring the lace design to another level. The ratios I used were roughly 2 parts cement, 1.5 parts sand, and 1.5 parts salt. All of these things sounded good in theory, but my actual casting ended up being everything I thought it wouldn’t be.

Brick Four: 2 : 1.5 : 1.5 - Cement, Sand, Salt
It looks… like 100% sand? Like it looks like I brought my mold to the beach, took wet sand, shoved it in my mold, and let it dry out. This brick was super fragile, too. I had to store it separately from the rest of my bricks because it was so crumbly and still retained so much moisture. I’m not too sure where I went wrong on this guy… Maybe there’s some sort of chemical explanation for what happened. I would have assumed the opposite effect would have happened… and with the addition of salt, I definitely didn’t expect the moisture retention. Maybe this mixture requires less water than the others and that’s where I went wrong? Or maybe salt would be a good substitution for part of the sand, but not necessarily the aggregate? These are all questions I have that I would love to experiment with if I ever did a second part to this material study. All I know is that if I am ever trying to create the texture of wet beach sandcastle sand, I have the perfect recipe!
For my final brick in this edition, I went back to my tried and true recipe: 2 parts cement and 1.5 parts sand. I still wanted to try out a thinner aggregate for one of my bricks, and when I saw a peer using glitter, I totally copied them and jumped on the bandwagon to try it out.
Brick Five: 2 : 1.5 : 1, cement, sand, glitter
The glitter brick came out nice! It had a sparkle to it and still captured a lot of the lace detail in the casting. I was super excited to finish my edition of this material study with what I deemed a successful brick.
Overall, I had a fantastic time experimenting with this study. Trying out recipes and throwing stuff in there that you have no idea what the outcome will be felt liberating and fun. I think doing exercises like this is super important because it helps you be more loose with the idea of “failure”, or problem solving a mistake into a success. I hope to not only study concrete again, but dedicate time to experiment with other materials as well. I’d love to dedicate time to this type of practice in my work moving forward.